KYC Screens
KYC (Know Your Customer) is the identity check every customer must finish before their first investment. It is required by SEBI. It runs across 8 screens inside the app, including two hand-offs to outside services (DigiLocker and eSign).
Pending = KYC in progress · Esign_Required = needs the eSign step · Submitted = sent for verification · Successful = done · Rejected = failed, must redo · Expired = timed out. See the KYC Status Explanations support page.
Screen 1 — KYC Start
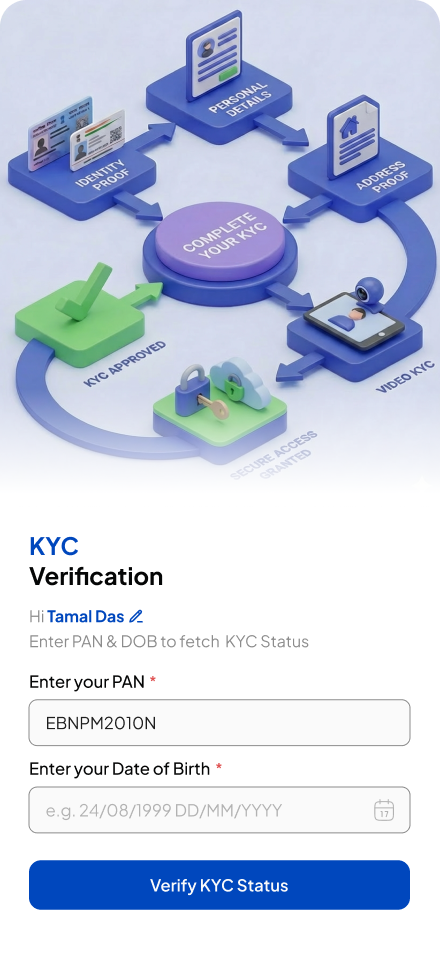
What the customer sees: the KYC Verification heading, a personalised greeting "Hi ✎" (the pencil opens a name edit), a pre-filled PAN field (editable), a Date-of-Birth field with placeholder e.g. 24/08/1999 DD/MM/YYYY, and a Verify KYC Status call-to-action. The illustration above shows the four KYC pieces — Identity Proof, Personal Details, Address Proof, Video KYC — converging into "Complete your KYC".
Keyboard: OS alphanumeric for PAN (auto-uppercased); OS date picker / numeric for DOB.
Reached from the Home banner ("Complete your KYC") or automatically when the customer tries to invest without KYC.
Screen 1b — KYC Check Step 2
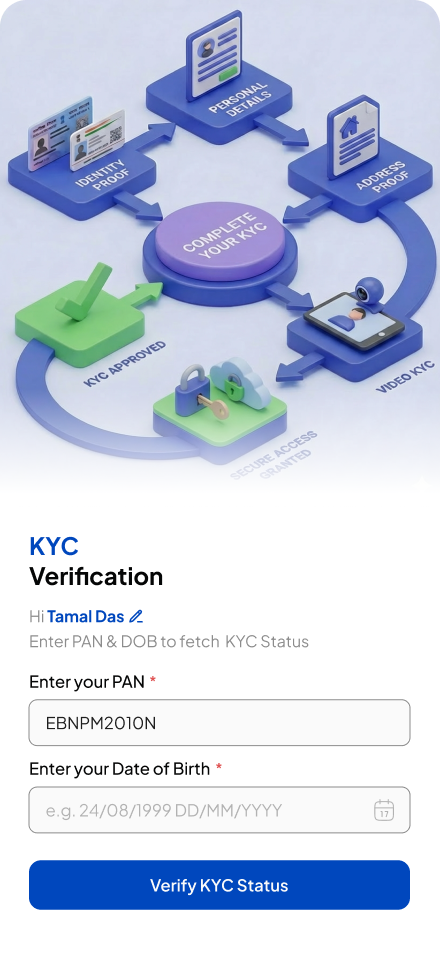
What the customer sees: the KYC Verification heading exactly as on SS11 — same illustration, same greeting "Hi ✎", the PAN field pre-filled with the value the customer just entered (e.g. EBNPM2010N), and a cleared DOB field with the e.g. 24/08/1999 DD/MM/YYYY placeholder. The customer must re-enter the DOB to confirm. Verify KYC Status is the CTA.
Why a second step exists: the registrar's first-pass lookup returned a partial match on PAN + DOB (most often a name-format mismatch — initials vs full name, hyphens, case). The app sends the customer through SS11 again with the PAN locked, so the second submission is treated as confirmation. After this, the flow branches based on the KYCAction returned by the backend.
The screenshot here is visually indistinguishable from SS11 unless you notice the PAN is now pre-filled and the DOB is blank (on SS11, the PAN was the one the customer just typed). When a customer says "the same KYC screen keeps coming back", this is what is happening — they are not in a loop, they are on Step 2.
Keyboard: OS numeric for last-4 / DOB confirmation fields. PAN is read-only on this pass.
Outcome routing:
Backend KYCAction | What the app does next |
|---|---|
Modify | Customer goes to Personal Information with existing fields pre-filled |
Create | Customer goes to Name entry to start fresh KYC |
Disallowed | Customer sees a blocked message; agents must escalate to L2 |
None / Unknown | App shows a generic retry — call back later |
See Status Words → KYC actions.
Screen 2 — Name entry (new investor only)
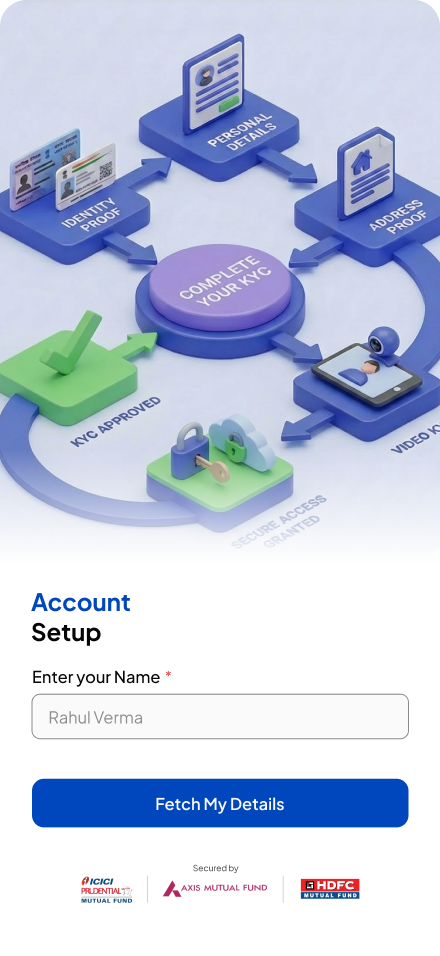
What the customer sees: the Account Setup heading, a single Enter your Name field pre-filled with the registered name, and a Fetch My Details CTA that pulls demographic info from the registrar.
Keyboard: OS alphabetic.
The name must be exactly as printed on the PAN card. A mismatch causes rejection later. See the PAN Mismatch / Name Correction support page.
Screen 3 — Personal Information
The same screen has two visible states — before the email OTP has been requested and after the OTP has been typed in.
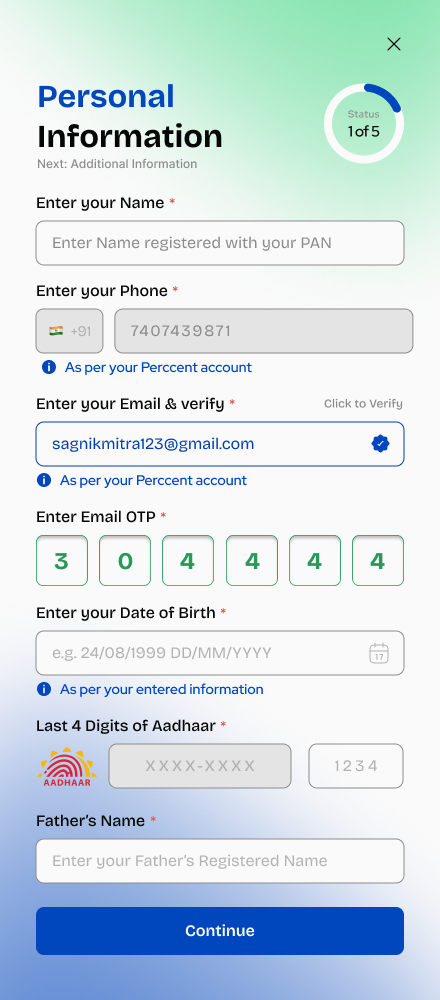
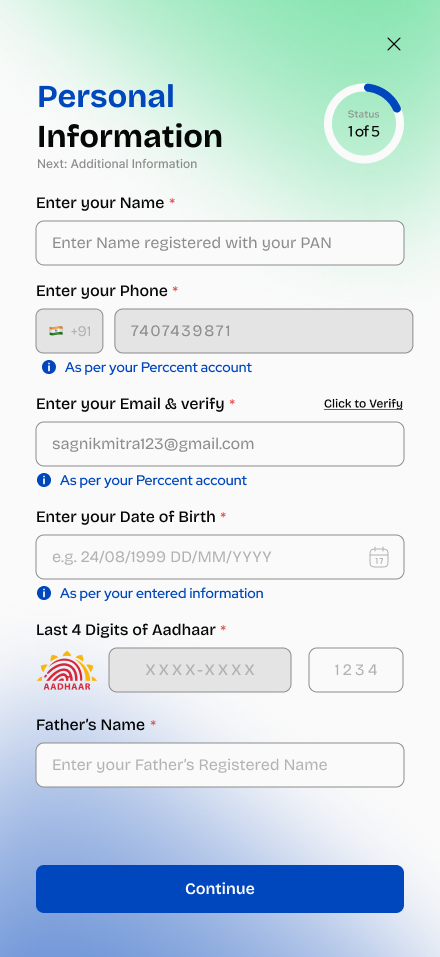
What the customer sees / fills in:
| Field | Notes |
|---|---|
| Name | Pre-filled, locked |
| Phone | Locked — already verified at login (+91 7407…) |
| Email + verify | Inline 6-digit email OTP appears once the customer taps Click to Verify; small green tick when verified |
| Date of Birth | Date picker (DD/MM/YYYY) |
| Last 4 digits of Aadhaar | XXXX-XXXX mask + a 4-digit field (1234) |
| Father's Name | Free-text |
| Button | What it does |
|---|---|
| Continue | Saves and moves to Address |
| Click to Verify (email row) | Sends a 6-digit code to the email |
Keyboard: mixed — alphanumeric for email and father's name, numeric for last-4 of Aadhaar and the email OTP.
This screen needs the device location turned on. If the customer denied location, they will see "Location Access Required" or "Location Permission Denied" and cannot continue. Tell them to tap Open Settings, enable Location for Perccent (set to "While Using"), return to the app and retry. There is no way to skip this. See the Geolocation Permission Denied support page.
Screen 3b — Additional Information
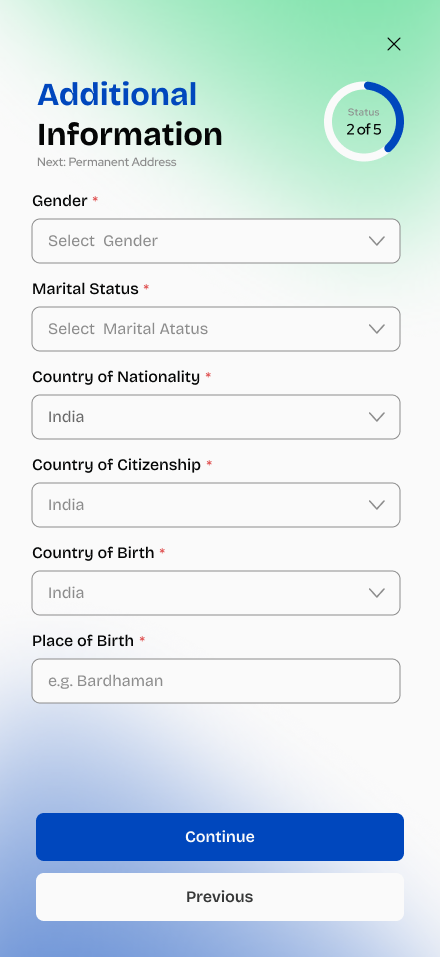
What the customer sees: the Additional Information heading with "Next: Permanent Address" sub-line and the Status 2 of 5 ring on the top-right. Six required fields:
| Field | Type | Default / notes |
|---|---|---|
| Gender | Dropdown | Select Gender — Male / Female / Other |
| Marital Status | Dropdown | Select Marital Status (placeholder text in the app reads "Atatus" — known typo, not a custom field) |
| Country of Nationality | Dropdown | Defaults to India |
| Country of Citizenship | Dropdown | Defaults to India — NRIs change this |
| Country of Birth | Dropdown | Defaults to India |
| Place of Birth | Text | Placeholder e.g. Bardhaman |
Buttons: Previous (returns to SS13) and Continue (saves and moves to SS15 Permanent Address).
Keyboard: OS alphabetic for Place of Birth; dropdowns for the rest. No PAN, no Aadhaar on this screen — those are on SS13.
The dropdown placeholder reads "Select Marital Atatus" (missing the S). It is a known UI copy bug on the live build, not a custom field. Tell the customer it is the Marital Status field — they should pick Single / Married / Divorced / Widowed.
NRIs and OCI holders must change Country of Citizenship away from India. This downstream affects FATCA / CRS declarations on SS16 and the bank-account-type options on the Onboarding Bank step (NRE / NRO).
Screen 4 — Permanent Address
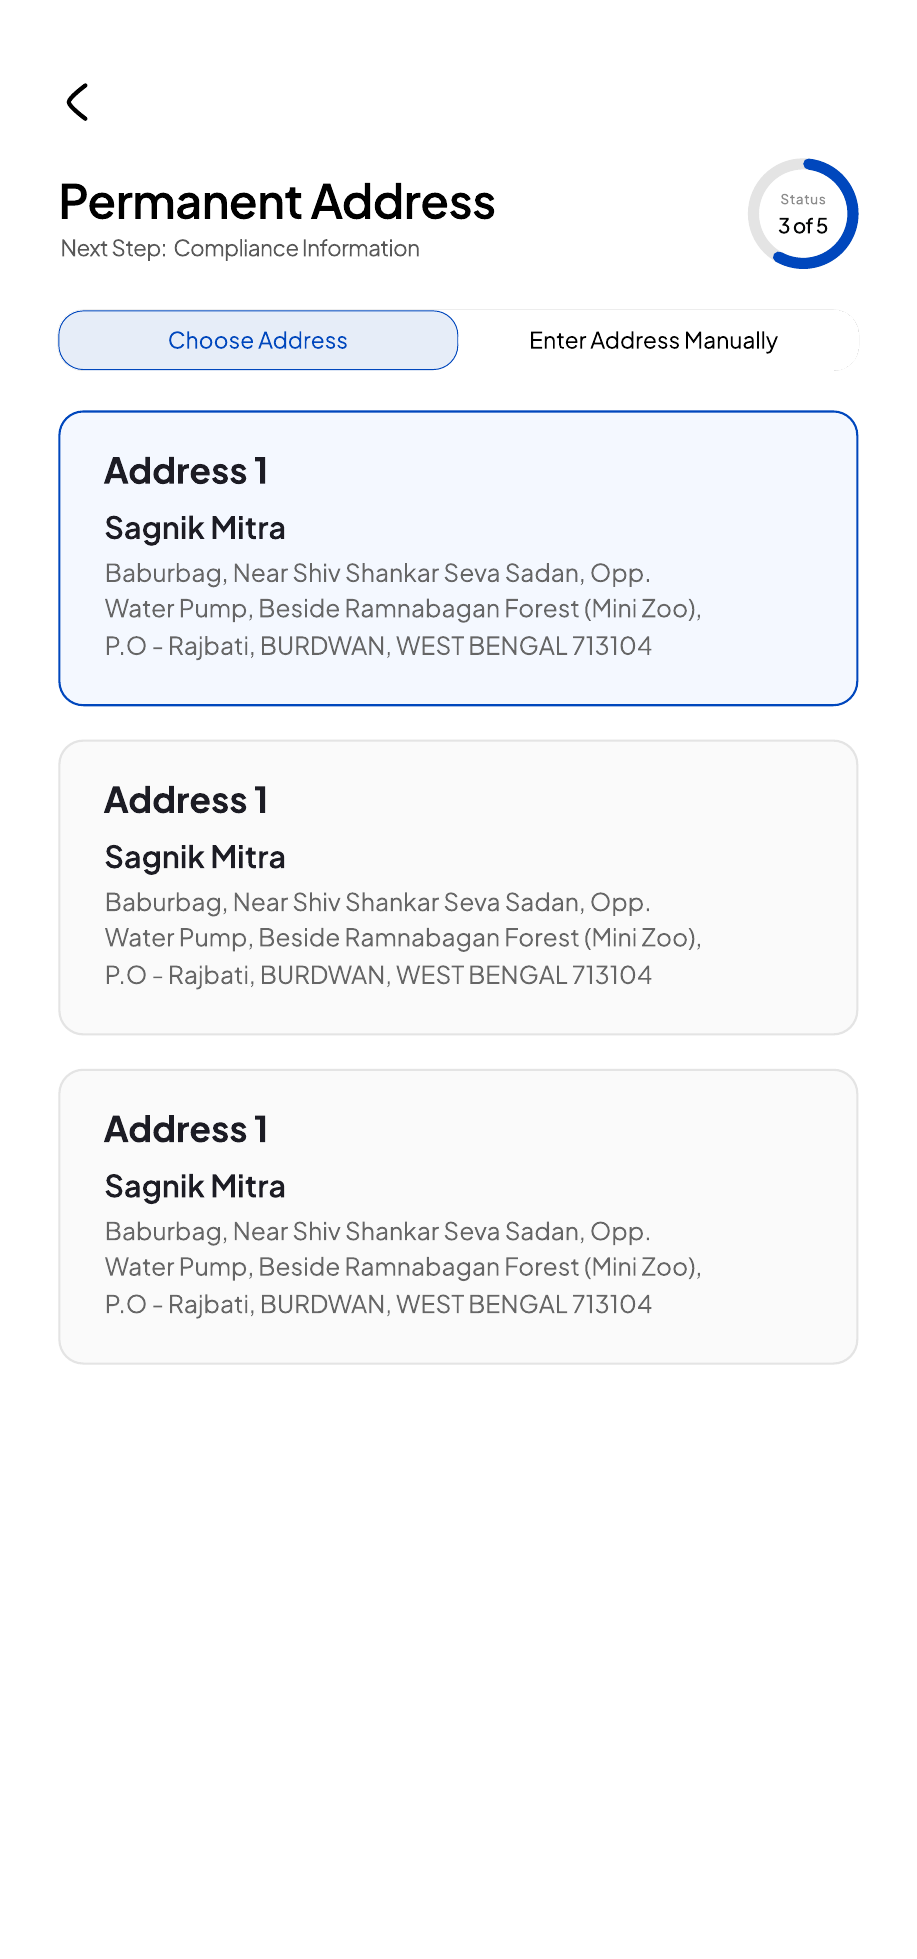
The address step shows a tab toggle — Choose Address (pre-filled options pulled from the KRA) or Enter Address Manually.
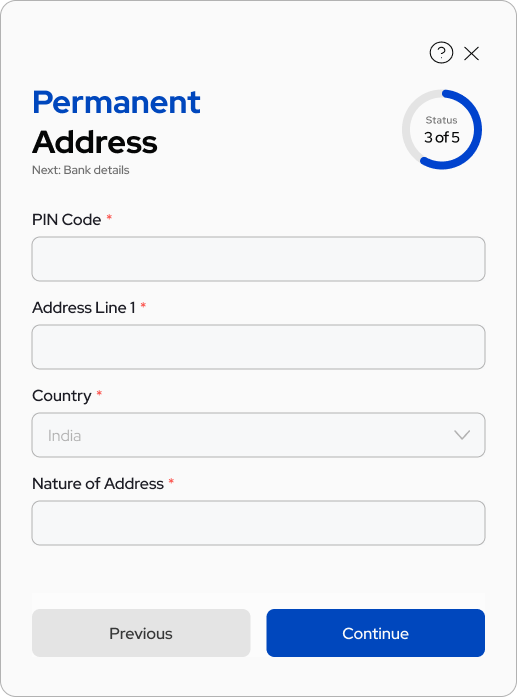
Manual entry fields: PIN Code, Address Line 1, Country (defaults to India, dropdown), Nature of Address (dropdown — e.g. Residential / Business / Registered Office).
Keyboard: OS numeric for PIN, OS alphanumeric for Line 1.
On the Choose Address tab, the app currently labels every saved address as Address 1. This is a known cosmetic bug — the cards are real, distinct KRA records, just mis-numbered. Ask the customer to read the city/PIN of each card to differentiate them.
Screen 5 — Compliance Information
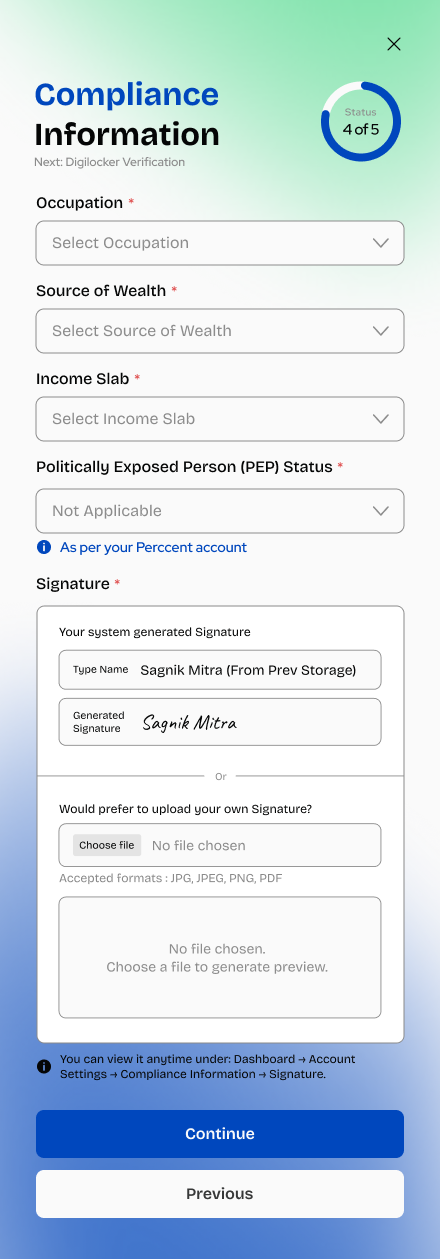
What the customer fills in: Occupation, Source of Wealth, Income Slab, Politically Exposed Person (PEP) status (default Not Applicable), and a Signature block.
Signature block — two sources:
| Source | What it does |
|---|---|
| System-generated signature | Uses the customer's name as a stored handwriting font — shown in two preview boxes (Type Name and Generated Signature) |
| Upload your own | Choose a file in .JPG, .JPEG, or .PDF format — preview pane appears below |
Keyboard: dropdowns + native file picker. No text keyboard.
The helper text confirms: "You can view it anytime under: Dashboard → Account Settings → Compliance Information → Signature."
Screen 6 — DigiLocker verification
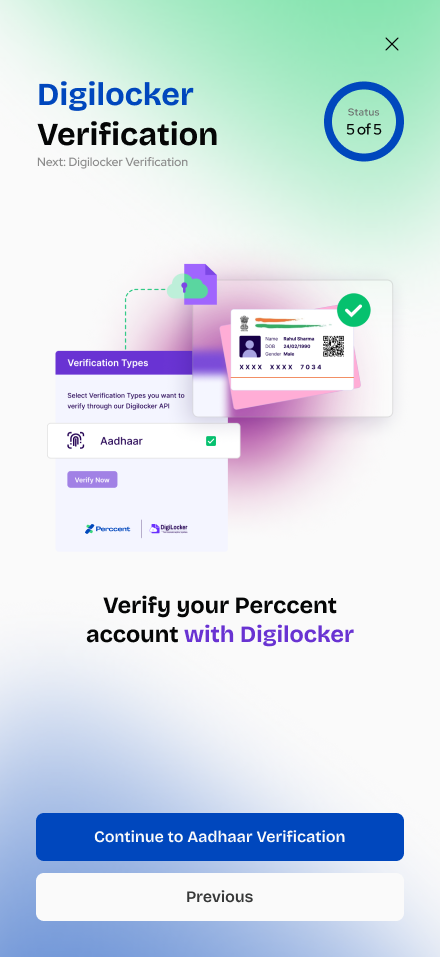
What the customer sees: the Digilocker Verification heading, an illustration of an Aadhaar card with a verification-types card (Aadhaar — tick — Verify Now), and a primary CTA Continue to Aadhaar Verification.
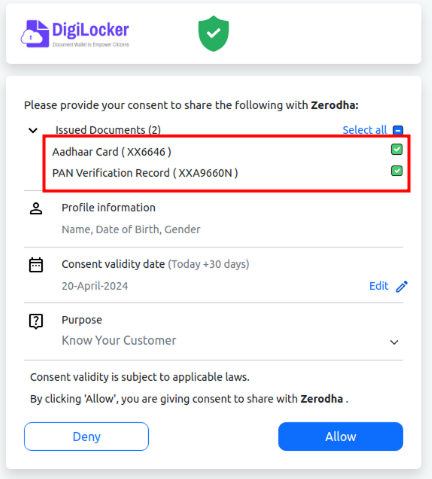
After tapping Continue, the customer is taken to the external DigiLocker consent page (SS17B). That page is hosted by DigiLocker (digilocker.gov.in), not by Perccent. It lists:
- Issued Documents — Aadhaar Card (XX6646) and PAN Verification Record (XXA9660N) — masked, both pre-ticked
- Profile information — Name, Date of Birth, Gender
- Consent validity date — typically today + 30 days
- Purpose — Know Your Customer
- Allow / Deny buttons
The customer must tap Allow for KYC to proceed. Deny sends them back to the in-app SS17 with no progress saved.
What happens: the app hands off to DigiLocker (a Government of India service) to fetch the customer's Aadhaar and PAN digitally.
Keyboard: none on this screen — the DigiLocker page that opens uses its own UI.
Important behaviour: the main button auto-continues after 3 seconds — the customer does not need to do anything if it proceeds on its own.
DigiLocker is a government service. If it is down or the network drops, this step cannot complete — it is not a Perccent fault. Ask the customer to check their connection and retry, or try again later. See the DigiLocker Not Working support page.
Screen 7 — eSign verification
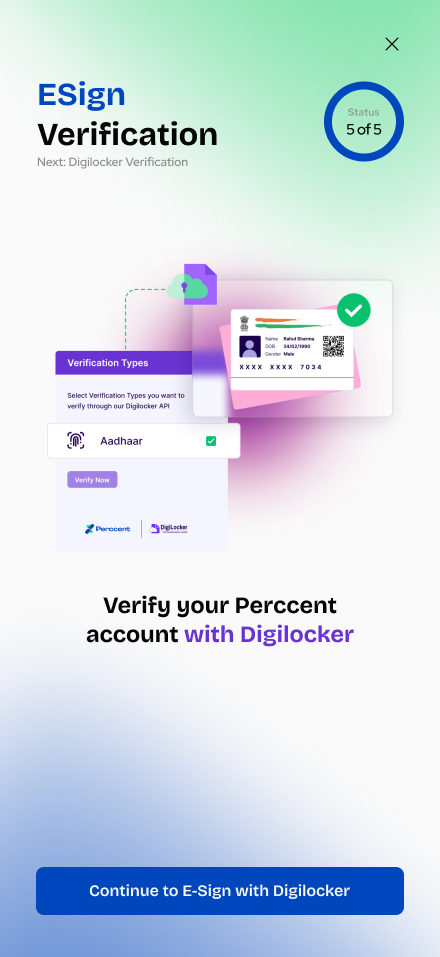
What the customer sees: the ESign Verification heading on the same DigiLocker-style layout, with the CTA Continue to E-Sign with Digilocker.
What happens: this is the final KYC step — an Aadhaar OTP-based electronic signature on the KYC form.
The Aadhaar number is NOT re-entered — it is already taken from the DigiLocker step (SS17). On the eSign page UIDAI shows the masked Aadhaar (XXXX-XXXX-NNNN) and sends an OTP to the mobile number linked to that Aadhaar. The customer enters only the 6-digit OTP to complete the digital signature.
Keyboard: OS numeric for the 6-digit OTP on the UIDAI page that opens.
Important behaviour: the main button also auto-continues after 3 seconds.
SS17 (DigiLocker) and SS18 (eSign) use the same artwork — only the heading and the CTA change. If a customer is unsure which one they are on, ask them to read the heading at the top and the button text.
The eSign OTP comes from UIDAI. The customer must have access to the mobile number linked to their Aadhaar. If UIDAI fails repeatedly, ask them to try later. See the eSign Failed support page.
The app remembers progress on the server. When they reopen it, KYC resumes from where they left off — it does not restart from screen 1. If they were on eSign, they go straight back to eSign.